- Office Hours: M-F 8:30 AM - 5:00 PM
The following steps are to guide changing firmware on SuperSting systems built prior to the current WiFi system. The WiFi systems built in 2013 onward can update firmware over WiFi using the Android App if the firmware version ends with .65E or newer. If the WiFi system has an older firmware than .65E, the serial type firmware update will be needed before moving to the WiFi firmware method.
Firmware changes are also used to allow marine streaming mode vs land mode. The land firmware has more features for land surveys and handles both Dual-Mode and Switchbox roll along modes of automatic switching, skip electrode list, etc. The marine firmware is primarily for boat towed surveys, but it can handle Switchbox and Dual-Mode surveys if roll-along is not needed. The WiFi systems built in 2013 onward have a new receiver board which can handle a larger firmware memory that adds additional features such as PoweSting functions without the need for a firmware swap.
From time to time, new firmware for the SuperSting is available at the AGI SuperSting UserGroup: Click Here
Please register as a SuperSting owner to receive a password to access this site. This way you can download the new firmware and load it into the SuperSting flash memory and also receive notifications of updates from time to time. By doing this, your SuperSting will always be up to the latest firmware standard. To find out which model you have, look at firmware version number on the SuperSting menu 7. If it ends with a letter "E" then you have the Model E type and you then need to make sure only to load firmware of “E” type. If you have any questions regarding the firmware version to download, please contact AGI support. Click Here for these contact details. In order to load a new firmware into the SuperSting proceed as follows
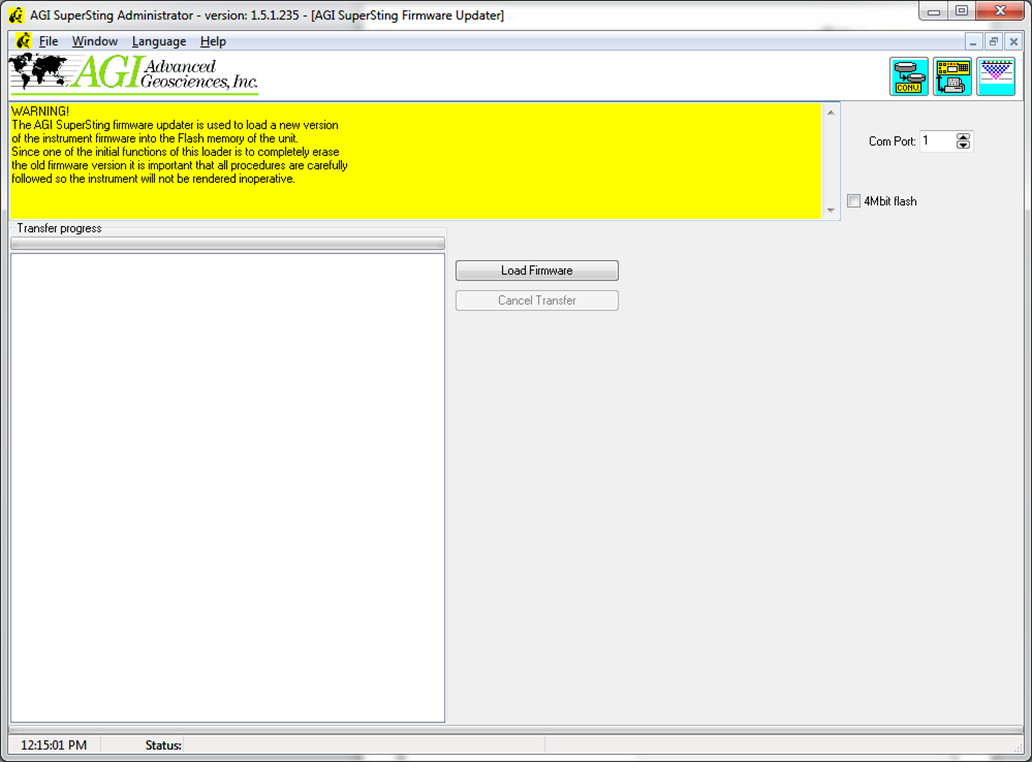
Make sure you download and install SuperSting Administrator software version 1.5.1.235 or newer. Use the special cable for loading firmware into the SuperSting (do not mix up this cable with the data upload/download cable). The firmware cable connects to the SuperSting as shown in the picture below marked “Ext. TX. COM or Firmware” . The SuperStingR1 has this port marked (PC SERIAL COM2).

The type of communication used for firmware will not work properly with USB/Serial adapters unless they have absolute/strict serial port emulation. For uploading of firmware, it is best to use a computer with a built in serial port as shown in the two images below or an approved adapter.

Do not use other USB to serial adapters or the firmware will likely fail during the step where it is writing new firmware after erasing the old firmware. This will render the SuperSting non-operational. AGI Technical Support will need to send special instructions that require opening and resetting the SuperSting with an internal switch and then loading several different files in a more complex procedure. To avoid this, make sure to find a computer with a built in serial port and stable power supply/fully charged battery or use an approved adapter. AGI has tested numerous serial port adapters and recomends these two serial port emulation devices. The Brainboxes model US-101 for USB or XC-235 for laptops with an ExpressCard (PCIe) slot are approved for firmware upload only.
Click Here for Brainbox CX-235
Click Here for Brainbox Serial US-101
•Turn on the SuperSting and go to the main menu.


